Windows 10 VPN Client連線設定

若您覺得文章寫得不錯,請點選文章上的廣告,來支持小編,謝謝。

本文介紹Windows 10設定VNP Client的連線方式


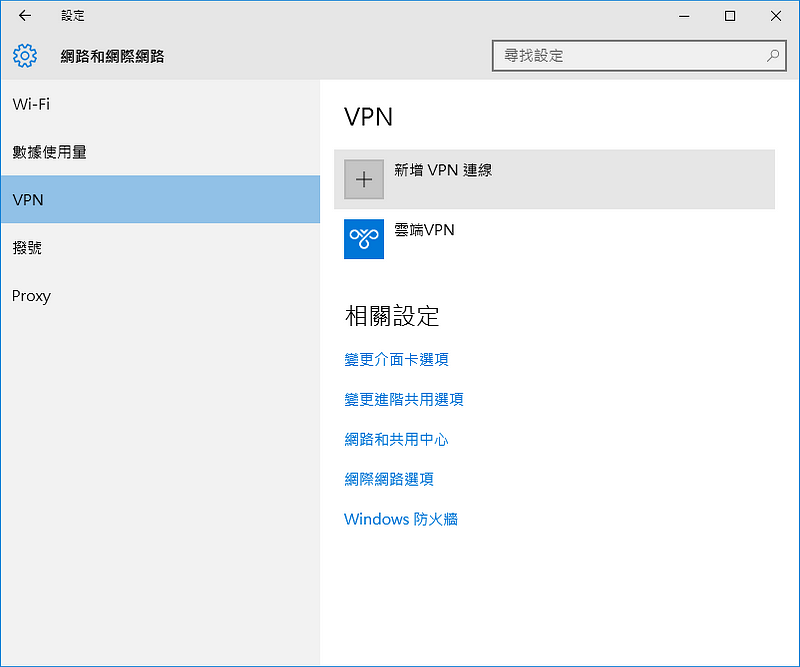
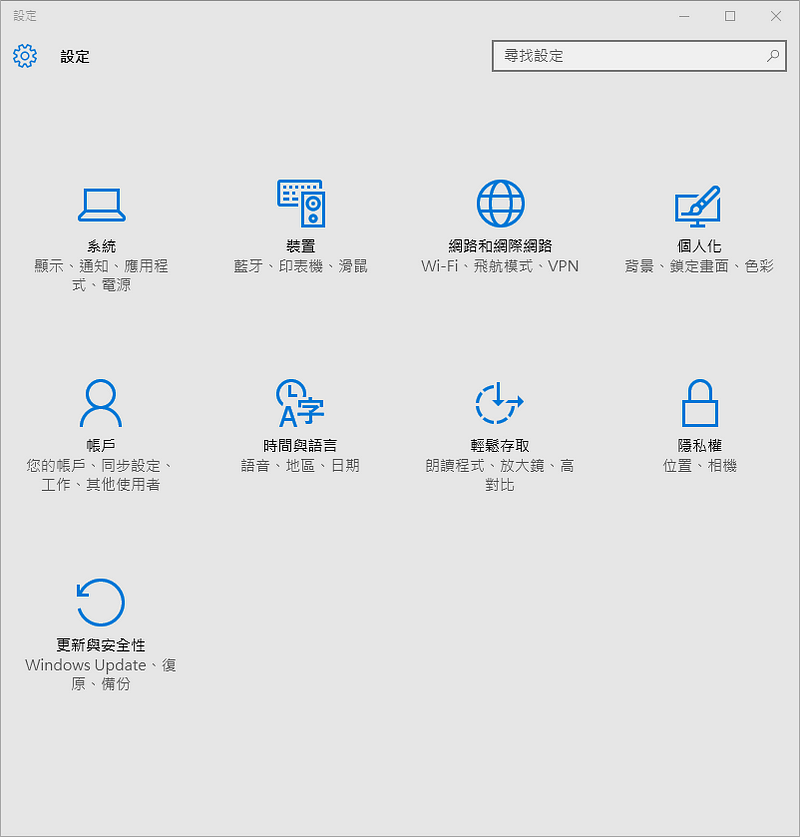
一、開啟【設定】中的【網路和網際網路】

二、選擇【新增VPN連線】
 
輸入VPN連線的資訊
  • VPN提供者:選Windows(內建)
  • 連線名稱:Your_TestVPN_Name
  • 伺服器名稱或位址:Your_VPN_Server_IP
  • VPN類型:自動
  • 登入資訊的類型:使用者名稱與密碼
  • 使用者名稱:User_Account
  • 密碼:Your_User_Account_Password
設定好後點選【儲存】

三、點選 TestVPN 的【連線】

若設定正確的話,會在網路連線資訊看到VPN的連線。

Linux 遠端桌面環境建立

若您覺得文章寫得不錯,請點選文章上的廣告,來支持小編,謝謝。

在本部落格的「在Ubuntu上安裝 Lubuntu Desktop ( Install Lubuntu Desktop on Ubuntu )」一文中,是用VNC的方式來登入Linux Desktop。若要使用Windows系統內建的遠端桌面連線程式來連Linux Desktop的話,要怎麼做呢?有下列幾個步驟:
  1. 安裝 xfce 桌面環境
  2. 安裝 xrdp
  3. 建立sudo user
1. 安裝 xfce 桌面環境

sudo apt-get update
sudo apt-get install xfce4-goodies
apt-get install xfce4


2. 安裝 xrdp
sudo apt-get install xrdp

3. 建立sudo user
以有root權限的使用者登入後,使用底下指令來新增 username,請將 username 替換成要建立的使用者名稱。
sudo adduser username
將此使用者 username 加到 sudo 群組裡:
usermod -aG sudo username
以底下指令切換到此 user:
su - username
測試此 user 是否有 root 權限:
sudo ls -la /root

這三個步驟完成後,就可以用Windows的遠端桌面用戶端來登入Linux Desktop了。

在Ubuntu 18.04 安裝 WordPress

若您覺得文章寫得不錯,請點選文章上的廣告,來支持小編,謝謝。

在安裝 WordPress 之前,要先建立好LAMP或LEMP環境,此部份請參考【Ubuntu 18.04 LAMP(Linux+Apache+Mysql+PHP)環境建立】或【Ubuntu 18.04 LEMP(Linux+Nginx+Mysql+PHP)環境建立】文章。

步驟一: Create a MySQL Database and User for WordPress
登入 mysql:
mysql -u root -p


建立給 wordpress 使用的資料庫:
CREATE DATABASE wordpress;


建立 database 的帳戶:
CREATE USER wordpressuser@localhost IDENTIFIED BY 'password';

設定DB帳戶權限:
GRANT ALL PRIVILEGES ON wordpress.* TO wordpressuser@localhost;


更新目前MySQL的登入狀態:
FLUSH PRIVILEGES;


離開DB:
exit


步驟二: Download WordPress
切換到home目錄:
cd ~
下載WordPress:
英文
wget http://wordpress.org/latest.tar.gz


中文
wget https://tw.wordpress.org/wordpress-5.0-zh_TW.zip


解壓縮:
tar xzvf latest.tar.gz


更新系統並安裝 php 與 libssh
sudo apt-get update
sudo apt-get install php5-gd libssh2-php


步驟三:設定WordPress
切換到WordPress目錄:
cd ~/wordpress
複製WordPress設定檔的範本:
cp wp-config-sample.php wp-config.php


產生安全金鑰:
curl -s https://api.wordpress.org/secret-key/1.1/salt/


會得到類似下圖的安全金鑰:(記得自己產生一組唯一的安全金鑰!!!不要使用下圖的安全金鑰!!!)


編輯WordPress設定檔(wp-config):
nano wp-config.php


找出安全金鑰的位置,如下圖:


將自己所產生的安全金鑰複製到 wp-config.php檔案裡:


修改wp-config.php檔案中的DB_NAMEDB_USERDB_PASSWORD的內容:


修改完畢後,存檔離開nano。


步驟四:複製檔案到文件的根目錄(請根據使用的Web Server,nginx或apache來參考)
使用nginx Web server時
預設根目錄在 /usr/share/nginx/html/ ,用底下指令將WordPress資料夾複製到/usr/share/nginx/html/
sudo rsync -avP ~/wordpress/ /usr/share/nginx/html/


切換到/usr/share/nginx/html/:
cd /usr/share/nginx/html/


initial server setup 的過程中,我們建立了一個名為 ubuntu 的帳號,我們將使用 ubuntu帳號來進行操作,更改/usr/share/nginx/html/資料夾的群組
sudo chown -R ubuntu:www-data *

建立上傳檔案用的資料夾:
mkdir /wp-content/uploads
更改 /usr/share/nginx/html/wp-content/uploads 資料夾的群組:
sudo chown -R :www-data /usr/share/nginx/html/wp-content/uploads

重啟 nginx
sudo service nginx restart

使用Apache web server時
The Ubuntu 14.04 LAMP guide 一文指出網站的根目錄是在 /var/www/html/。用底下指令將WordPress資料夾複製到/var/www/html/
sudo rsync -avP ~/wordpress/ /var/www/html/


切換到/var/www/html/:
cd /var/www/html

initial server setup 的過程中,我們建立了一個名為 ubuntu 的帳號,我們將使用 ubuntu帳號來進行操作,更改 /var/www/html 資料夾的群組:
sudo chown -R ubuntu:www-data *


建立上傳檔案用的資料夾:
mkdir /var/www/html/wp-content/uploads
更改 /var/www/html/wp-content/uploads 資料夾的群組:
sudo chown -R :www-data /var/www/html/wp-content/uploads

重啟 apache
sudo service apache2 restart

步驟五:Complete Installation through the Web Interface
在瀏覽器網址列,輸入:
http://server_domain_name_or_IP


會看到WordPress的設定畫面:

輸入好 Site Title、Username、Password、Email後,按下 Install WordPress,就會安裝好WordPress了。
PyGame 2D繪圖

若您覺得文章寫得不錯,請點選文章上的廣告,來支持小編,謝謝。

農曆新年到了,於是筆者幾天前用Python做了個文字小動畫,程式碼在此

做完後,心想也來發一篇和PyGame有關的2D繪圖吧。

基本繪圖
在PyGame要如何繪製直線、矩形、圓形、多邊形等常見的圖形呢?這些基本功能當然要先查API囉,所以來看一下PyGame Drawing API:http://www.pygame.org/docs/ref/draw.html 有提供那些功能。(底下文字取自 http://www.pygame.org/docs/ref/draw.html)


pygame.draw
pygame module for drawing shapes
pygame.draw.rectdraw a rectangle shape
pygame.draw.polygondraw a shape with any number of sides
pygame.draw.circledraw a circle around a point
pygame.draw.ellipsedraw a round shape inside a rectangle
pygame.draw.arcdraw a partial section of an ellipse
pygame.draw.linedraw a straight line segment
pygame.draw.linesdraw multiple contiguous line segments
pygame.draw.aalinedraw fine antialiased lines
pygame.draw.aalinesdraw a connected sequence of antialiased lines
簡短說明一下,rect是矩形、polygon是多邊形、circle是圓形、ellipse是橢圓形、arc是弧形、line是直線、lines是連續的直線線段、aaline是抗鋸齒的直線、aalines是抗鋸齒的直線線段。這些function呼叫的前兩個參數都是 Surface與Color。Surface是圖形呈現的地方,通常是screen。Color為圖形要顯示的顏色。

在電腦繪圖中,有一點需要注意的:「電腦座標系統」。和我們習慣的座標系統是不一樣的(見下圖,圖取自[2])

了解以上函式庫的使用方式以及電腦座標系統的觀念後,就可以開始著手設計要畫的圖案了。例如下圖(資料出處:[1])


更多的範例可參考 Program Arcade Games With Python And Pygame Chapter 5: Introduction to Graphics

參考資料:
[1] http://www.pygame.org/docs/ref/draw.html
[2] Program Arcade Games With Python And Pygame Chapter 5: Introduction to Graphics

Tinkercad Circuits:光控自走車 Light-Controlled Car

若您覺得文章寫得不錯,請點選文章上的廣告,來支持小編,謝謝。

If you like this post, please click the ads on the blog or buy me a coffee. Thank you very much.

本文將使用TinkerCAD Circuits來示範光感測器(Photoresistor)的應用:「光控自走車」。讀者也可參考本部落格的文章mBlock 單元十五:追光自走車
This tutorial uses the light brightness to control a car. This car could be implemented by a Arduino with photoresistors. Before assembling the hardware, the simulation could be done with TinkerCAD circuits. The reader could read this article:"mBlock Unit 15: Light-Tracking Car" later.

材料(Materials):
1. Arduino UNO R3 板子 x 1
2. 光感測器模組 Photoresistor x 2
3. 直流馬達 DC motor x 2
4. 杜邦線 jumper wire x 10

5. 麵包板 small breadboard x 1
6. 10K 電阻 resistor x 2


電路(Circuit):


Photoresistor is connected to Arduino UNO A2 and A0.
DC motor is connected to Arduino UNO pin 5 and pin 3.


程式碼(The Code):


示範影片(Demo Video):


範例連結(Example Link):
https://www.tinkercad.com/things/e26raWWttD7

Tinkercad Circuits:Ultrasonic 自動照明

若您覺得文章寫得不錯,請點選文章上的廣告,來支持小編,謝謝。

If you like this post, please click the ads on the blog or buy me a coffee. Thank you very much.

本文使用TinkerCAD Circuits來示範距離感測器(Ultrasonic)的應用:「自動照明」,距離越遠燈泡就越亮。
This is an application: "Distance-trigged light blub system". The application uses ultrasonic sensor to measure distance. And the light bulb's brightness is becoming higher when the distance is getting farther.

材料(Materials):
1. Arduino UNO R3 板子 x 1
2. 距離感測器模組 Ultrasonic x 1
3. 燈泡 light bulb x 1
4. 杜邦線 jumper wire x 5

電路(Circuit):


程式碼(The Code):


示範影片(Demo Video):


範例連結(Example Link):
https://www.tinkercad.com/things/0wvwVcvzDrx

刪除Windows 10 下的 Windows.old 資料夾

若您覺得文章寫得不錯,請點選文章上的廣告,來支持小編,謝謝。

Windows 10在更新後,有時會出現 Windows.old 資料夾,於是筆者就參考 Youtube上的影片:


來進行刪除的動作。以系統管理者的權限開啟命令提示字元,使用底下三個指令來處理:
  1. takeown /F C:\Windows.old\* /R /A 
  2. cacls C:\Windows.old\*.* /T /grant administrators:F
  3. rmdir /S /Q C:\Windows.old\
這樣子就可以刪除 Windows.old 資料夾了。

Tinkercad Circuits:生氣指數 LED 燈 Sound triggered LEDs

若您覺得文章寫得不錯,請點選文章上的廣告,來支持小編,謝謝。

If you like this post, please click the ads on the blog or buy me a coffee. Thank you very much.

本文使用TinkerCAD Circuits來示範聲音感測器的應用:「生氣指數」,聲音越大LED就越亮也越多顆。
Sound sensor application: "Sound triggered LED". This sound level to control the number of LEDs. The higher the sound level, the more LEDs are on.

材料(Materials):1. Arduino UNO R3 板子 x 1
2. 聲音感測器模組 Sound sensor x 1
3. LED 燈 x 4
4. 杜邦線公對公 male/male jumper wire x 8
5. 220歐姆電阻 220 ohm resistor x 4
6. 麵包板 Breadboard x 1

電路(Circuit):

上圖是用Photentiometer表示聲音感測器模組。
Sound sensor signal pin is wired to Arduino UNO A0.
The LEDs' anodes are wired to Arduino UNO pin 3, 5, 6, 9, respectively.

程式碼(The Code):


示範影片(Demo Video):


範例連結(Example Link):

Python in Visual Studio Code

若您覺得文章寫得不錯,請點選文章上的廣告,來支持小編,謝謝。

If you like this post, please click the ads on the blog or buy me a coffee. Thank you very much.

This tutorial will focus on the setting of Python in Visual Studio Code.

Step 1: Download The Required Software

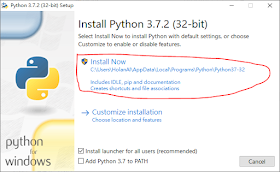
Step 2: Installing Visual Studio Code & Python
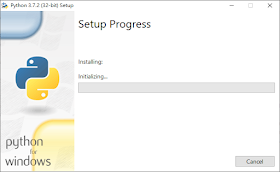
By click the installers to install Python and Visual Studio Code. Then choose the default configuration(next, next, and next)


Step 3: Install the Python extension for VS Code.

Click Extension icon. And input "Python extension for VS Code" to search the extension. Then, install(or reload) it.

Step 4: Creating a VS Code project folder
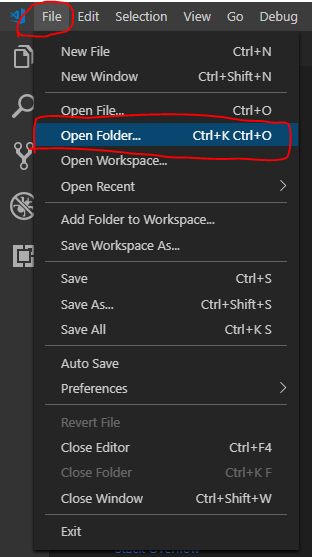
Creating a folder to your preferred path. Open this folder from VS Code.
File ==> Open Folder


Step 5: Checking the Python
Open a New Terminal, 

Type the command "py -V" to check python version. If the version is the installed version from Step 2 (On my PC, it is 3.7.2), then go to the next step.

Step 6: Select a Python interpreter
Open the Command Palette (Ctrl+Shift+P). And type the Python: Select Interpreter command to search. Then, select the command. 

Step 7: Create a Python source file
Click the New File button:

Name it test.py and input the following code, and save the file. 
greetingMsg = "Welcome to python world"
print(greetingMsg)

Step 8: Run the source file
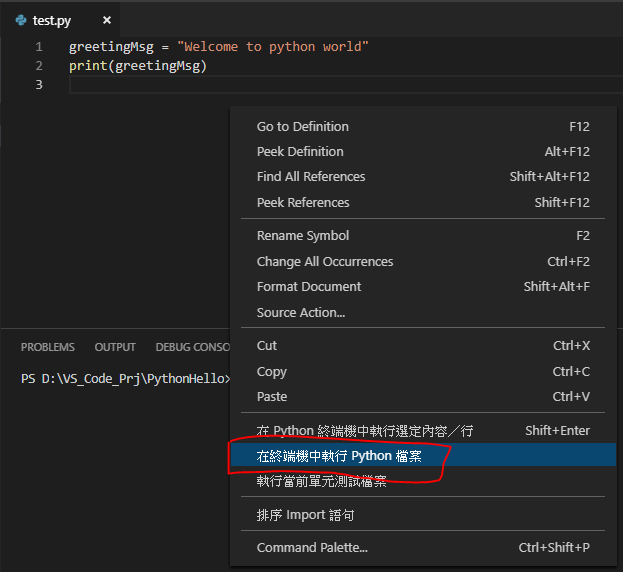
Right-click in the editor and select Run Python File in Terminal(在終端機中執行Python檔案):

And the result will display on the terminal window:

If you see the above result, then your python developing environment is ready. Have a fun with Python programming!.

References:
[1] https://code.visualstudio.com/docs/python/python-tutorial
[2] https://code.visualstudio.com/docs/languages/python

Tinkercad Circuits:大聲公

若您覺得文章寫得不錯,請點選文章上的廣告,來支持小編,謝謝。

If you like this post, please click the ads on the blog or buy me a coffee. Thank you very much.

本文使用TinkerCAD Circuits來示範聲音感測器的應用:「大聲公」,聲音越大LED就越亮。
Sound sensor application: "Sound triggered LED". This sound sensor controls the brightness of a LED with its' sound level.

材料(Materials):
1. Arduino UNO R3 板子 x 1
2. 聲音感測器模組 x 1
3. LED 燈 x 1
4. 杜邦線公對公 male/male jumper wire x 6
5. 220歐姆電阻 220 ohm resistor x 1

電路(Circuit):

上圖是用Photentiometer表示聲音感測器模組。
Sound sensor signal pin is wired to Arduino UNO A0.
The LED's anode is wired to Arduino UNO pin 9.

程式碼(The Code):


示範影片(Demo Video):


範例連結(Example Link):
https://www.tinkercad.com/things/4RDpugLYGE8