若您覺得文章寫得不錯,請點選文章上的廣告,來支持小編,謝謝。
If you like this post, please click the ads on the blog or buy me a coffee. Thank you very much.This tutorial will control a LED with a button.
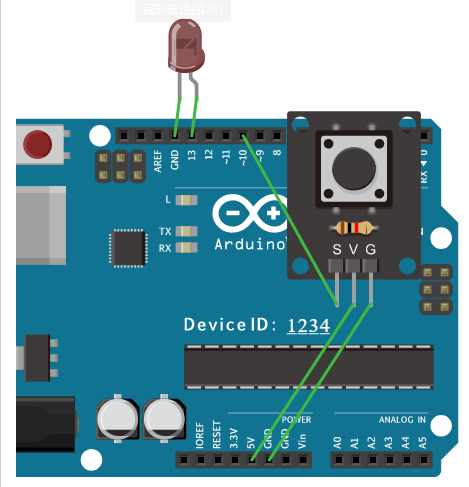
模擬器的接線方式,為一顆 LED ,長腳接D13,短腳接GND。(注意:實際硬體的LED燈是需要接上電組的,不然LED燈有可能會燒掉。)以及一個按鈕,S接D10,V接5V,G接GND。
Wiring:
- LED anode --> UNO D13
- LED cathode --> UNO GND
- Button S(signal) --> UNO D10
- Button V(voltage) --> UNO 5V
- Button G(ground) --> UNO GND
The circuit design is the following diagram. (Note: a resistor is needed for physical wiring to avoid destroying a LED.)
程式積木部分為:
The code:
範例網址 (Example URL):https://simulator.webduino.io/#-Kyxg9IBRGE_Wir9kKyZ
影片 (Demo Video):


沒有留言:
張貼留言