若您覺得文章寫得不錯,請點選文章上的廣告,來支持小編,謝謝。
If you like this post, please click the ads on the blog or buy me a coffee. Thank you very much.
Retropie本身的作業系統就是Raspbian,只不過是沒有 PIXEL 桌面的精簡版 (Raspbian lite),於是只要把桌面環境給裝好就有瀏覽器可以上網用了。
Retropie is based on Raspbian OS. However, it is lite version(without Pixel desktop) and user can install Pixel desktop to Retropie from Retropie setup menu.
步驟一:進入 Retropie 選單畫面
Step 1: Enter Retropie menu screen
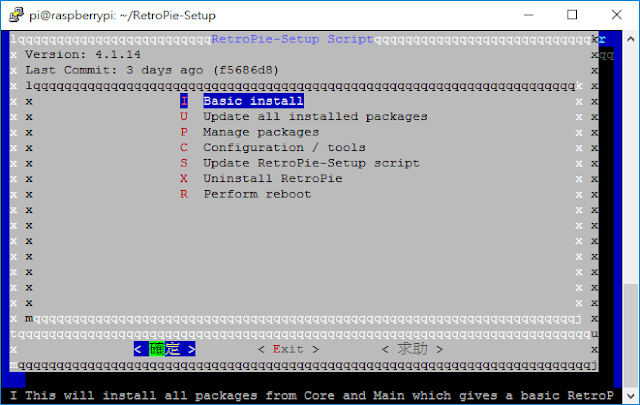
步驟二:選擇 Retropie 設定( Retropie Setup)
Step 2: Select RETROPIE SETUP
步驟三:選擇 Configuration / tools
Step 3: Select Configuration / tools
步驟四:選擇 raspbiantools - Raspbian related tools
Step 4: Select raspbiantools - Raspbian related tools
步驟五:選擇安裝 Pixel 桌面環境 Install Pixel desktop environment
Step 5: Select Install Pixel desktop environment
步驟六:安裝完成後,可在 Retropie 畫面看到 PORTS 的選項,選擇此選項
Step 6: After installing Pixel desktop, the PORTS option would be accessible from the Retropie menu
步驟七:進入 PORTS 的選單畫面,可看到桌面 (DESKTOP) 選項,選擇此選項即可進入到Pixel 桌面環境。
Step 7: The desktop environment could be accessible from the PORTS menu.
步驟八:恭喜您,進入到 Pixel 桌面環境。
Step 8: Congratulations! You have the Pixel desktop environment.


